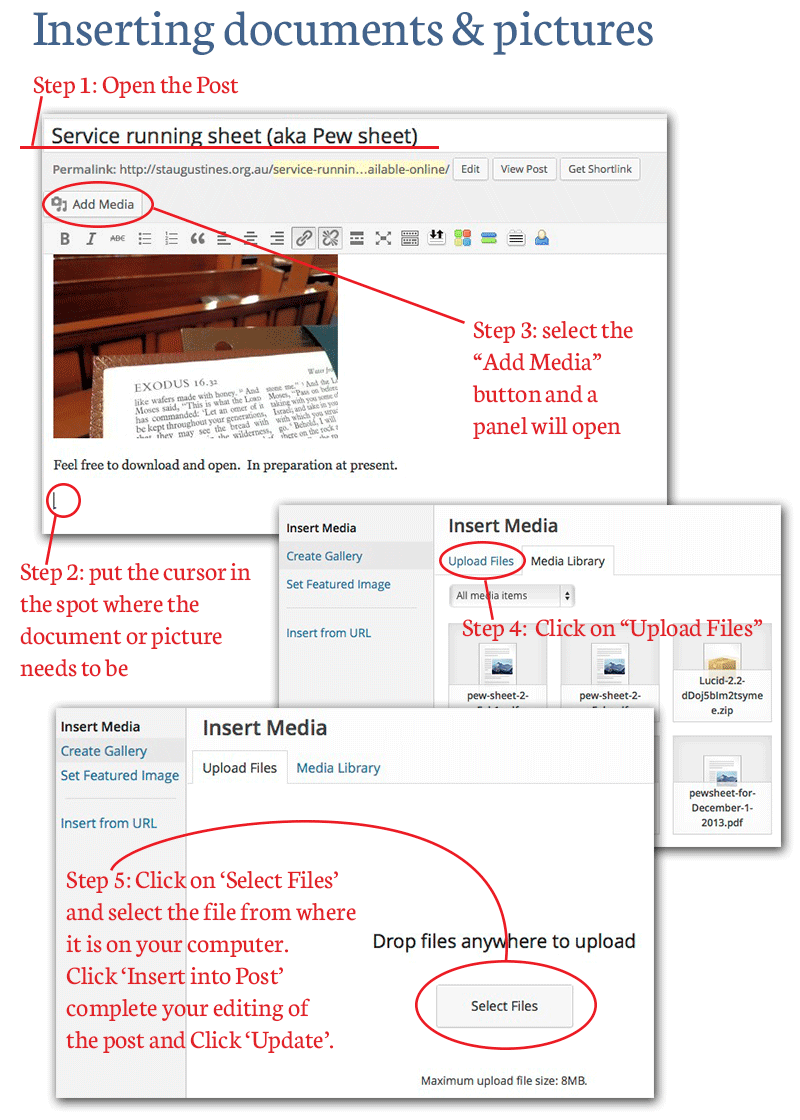
Adding Media to WordPress
Here is a pictorial guide on how to add to a Picture, Document Link, audio file or even a video to your WordPress site.
This little tutorial assumes the following before you begin.
- You have a WordPress site,
- You know the basics of editing a page or a post in WordPress
- The document or picture you want to add is available on the same computer as the Browser you are using to edit in WordPress.
The Steps

Step 1 – Open the page or Post you are going to edit.
Step 2 – Put your cursor (little vertical bar that flashes) on to the spot where you want to insert the picture.
Step 3 – Click on ‘Add Media’ and a new panel will open. This is the Insert Media panel.
Step 4 – On the Insert Media Panel, select ‘Upload Files’
Step 5.1 – Click on the the ‘Select Files’ button and navigate to your desired file on your computer.
Step 5.2 – Select the file and then click the ‘Choose’ button. The file will proceed to upload, if the file is big, this may take a while.
Step 5.3 – Once the file is loaded, you can see some options on the right side of the panel (not shown in the graphic), here you can add a title, a caption (which will show under a picture) and a description (Important for the Google & Bing Robots to know what is in the file). Update this information as needed
Step 5.4 – Click Insert into post. This item will now show in the spot where you put your cursor in Step 2.
Step 5.5 – complete your editing then click ‘Publish’ or ‘Update’ to save your changes tot he page or post.
There are a few other little secrets for modifying the look and feel associated with these files. Something to be explored in other posts.
Feel free to comment or share…